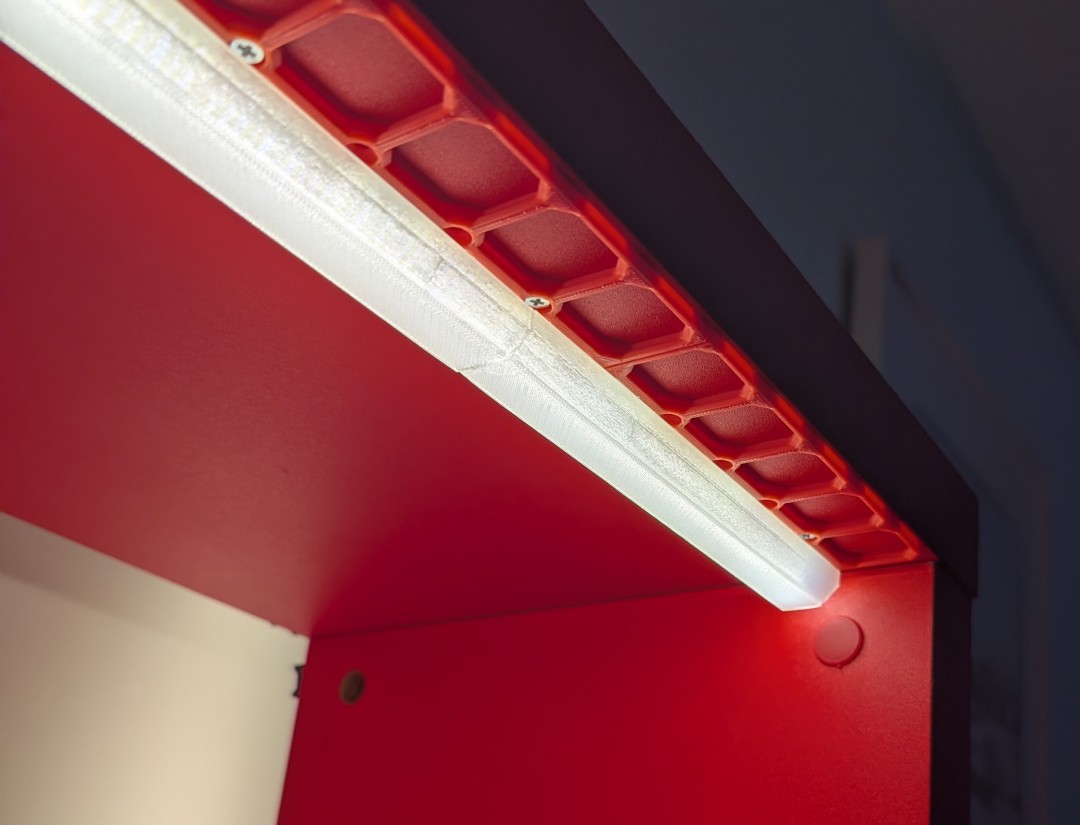
This light is a 3D printed diffuser over a COB LED strip, and this post is how to make your own.
It also works for non-COB LED strips.
openGrid and Underware
Instead of uploading some models for you to print I’m going to refer to existing systems that we’re going to customise. The first is openGrid, a flexible-yet-simple wall storage system. It provides the square grid that everything else is clipped to. I used the "light" grid and screwed it into my wooden shelves with screws at each end of 2-square-wide grids.
Try this generator to make grids of the exact size you need. You can even customise the screw holes to the exact screws you have.
We’ll also use the Underware 2.0 cable management system, but in particular this is what we need to customize to make the diffusers. In particular, we’ll use This customiser since it’s compatible with openGrid and lets us generate whatever shape we need.
Both of these systems are great in their own right.
Customising Underware
After printing your grid and mounting it, open the underware generator. Click Customize and choose the basic shape to start with, eg a straight "I" piece. In the new browser tab click "Code" to open the OpenSCAD code that generates this model - you don’t need to know anything about programming or OpenSCAD. Scroll down until you see:
/*[Hidden]*/Change it to
/*[Not Hidden]*/And Press the "X" in the top right of the code view. Now the hidden settings are available to you.
Change the following settings, they’re in different sections.
Channel Total Height: 15
Channel Length Units: how long do you need the channel?
Suppress Connectors: NBNBNBN
topChamfer: 6
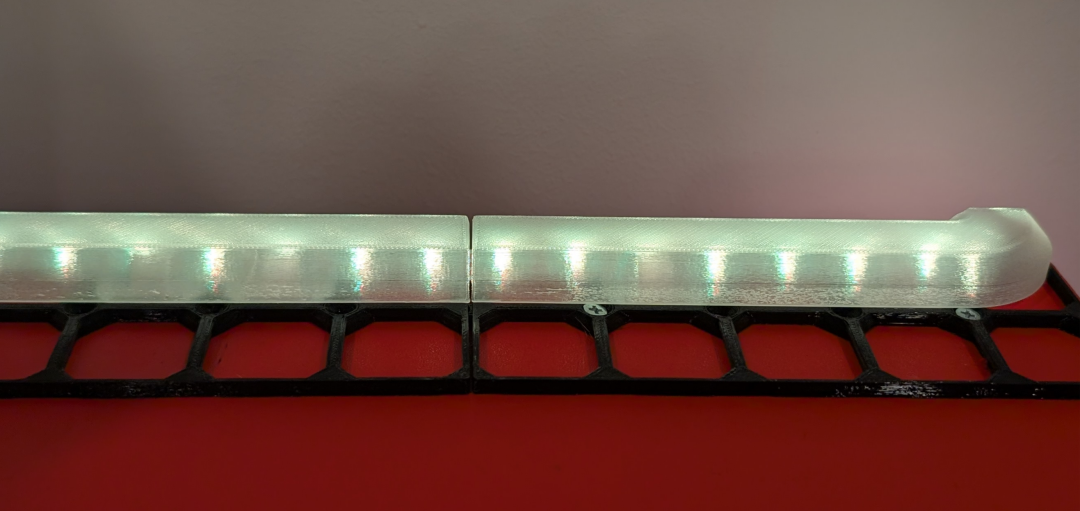
snapWallThickness: 1.2About Suppress Connectors. Each channel will have connectors that grip into the grid. But they also get in the way of placing tiles that will hold your LED strip in place. I have chosen to make channels 7 units long with grips every other tile.
Generate the model then download it. The download window will ask you what kind of printer you have. Don’t worry if you don’t have a Bambulab printer, just click Confirm then Download. Sometimes the download button asks me if I’d prefer to download an STL file, I would, it’s printer agnostic. And sometimes it doesn’t. I don’t know why. If you download a .3mf file you can open it in your slicer anyway, you may have to switch printers and settings back to your own profiles. Or if you already have a project open in, for example OrcaSlicer, and load the file as a model, it may ask if you want to import Geometry Only, choose Yes.
Printing
I’m using Polymaker Polylite PLA Natural, I expect any "Natural" or even many "White" PLAs would work. A translucent filament is more transparent if printed hotter and slower, but I don’t want transparent, I want a more "frosted" look, so I didn’t bother slowing down print speed or anything like that.
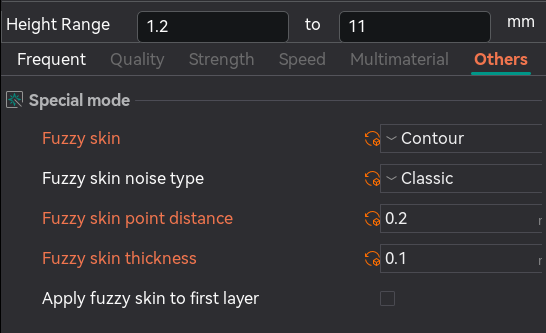
But to go more towards a frosted look I am using a textured build plate and "fuzzy skin". But the fuzzy skin should be applied selectively so it’s not on the mechanical parts that grip into the grid.
Add a hight range modifier from 1.2mm to 11mm and apply the fuzzy skin setting to that.
I used a point distance of 0.2mm and a thickness of 0.1mm.
That’s it!